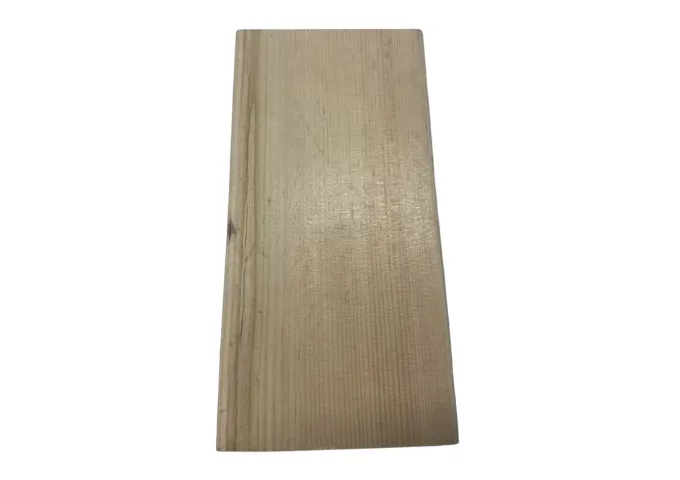
The Challenge of Traditional Wood Inspection and Volume Measurement
Wood processing workflows often face challenges because timber grain variation and surface flaws. Tiny cracks and tears hurt the look of panels and furniture. They also make them weaker. As wood goes through cutting, milling, and finishing, micro-defects appear more clearly. This raises the chances of product failures or customer returns.
Manufacturers face both surface flaws and dimensional inaccurate. These issues come from sawing and machining operations. Even small warps or thickness changes can disrupt assembly lines. This can cause misaligned joints, wasted materials, and expensive rework.

Measuring volume accurately is key to improving yield and reducing waste. However, traditional methods depend on manual gauge readings. These readings take time and are often affected by human error. Before, people mainly used manual inspection to find wood defects and check dimensions. This often occurred in busy places like container panel shops and custom furniture stores.
Skilled inspectors visually scan each board while measuring key dimensions by hand. This labor-intensive process can spot clear problems. But it can't match today's fast pace because it often misses tiny irregular objects smaller than a millimeter.
Manual inspection has its limits. It is slow, often misses defects, and costs a lot. This shows that we need an automated approach. Advanced 3D laser profilers check wood surfaces and measure volume. This helps manufacturers achieve quick, reliable, and consistent quality control.
Introducing the SRI7300 3D Laser Profiler
Automation has transformed countless manufacturing processes, and wood processing is no exception. The SRI7300 3D Laser Profiler changes how producers inspect surfaces and calculate volume. The SRI7300 sits above a conveyor line. It sweeps dense laser lines across each board at speeds of up to 20,000 Hz. This captures thousands of data points in every scan.
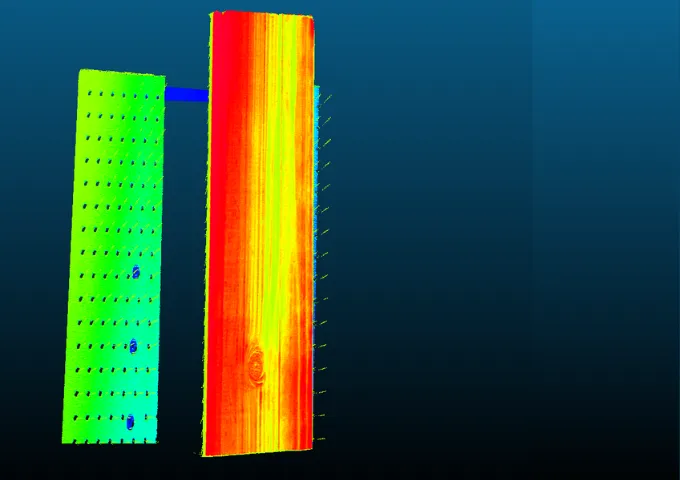
It samples 3,200 contour points on the X-axis with a 100 µm resolution. The Z-axis has 8 µm accuracy and 25 µm repeatability. These specs help the system find flaws as tiny as 1 × 1 × 1 mm. It does this with over 98% reliability, which is much better than what humans can do. The device measures the exact volume of each board. It does this by integrating cross-sectional profiles along the board's length. This provides real-time data on material use and helps optimize cutting patterns.
The SRI7300 inspects a three-meter board in only five seconds. This speed makes it perfect for fast production lines. It offers automated quality control and removes the delays caused by manual checks.
High-Resolution Surface Mapping
The SRI7300 defect detection centers on its high-resolution surface mapping ability. Each board undergoes thousands of micro-measurements. This process captures even the tiniest bumps on the surface. This means that we can find tiny splits, hidden knots, or small tears early.
Finding defects early helps manufacturers fix panels. This prevents costly steps like painting, laminating, or assembly. Processing yield rises above 95%. This leads to cost savings and fewer rejected batches.

Precision Volume Measurement
Volume measurement with the SRI7300 goes beyond simple length, width, and thickness data. The system makes detailed profiles. It also calculates the 3D volume of each wood piece in real-time. This insight helps production planners nest parts better. This cuts off by up to 15%.
The profiler’s volume data is key for operations that buy wood by the cubic meter. It also helps track material use for sustainability reports. No more guessing about board size. Every cubic centimeter plays a crucial role in the wise use of resources.
Real-World Benefits: Quality, Efficiency, and Cost Savings
Using the SRI7300 3D Laser Profiler brings clear benefits to wood production. The system detects defects with at least a 98% accuracy rate. This means almost no flawed panels move forward. Manufacturers achieve over 95% processing yield. This happens because manufacturers use only wood that meets strict standards.
The 3D profiler checks full-length boards in just five seconds. This allows it to operate without interruptions that would hinder production. The device sends outputs straight to the plant's automation network. This action triggers sorting gates. It updates inspection dashboards. It also alerts operators about any out-of-tolerance conditions in real-time.
Perhaps the most compelling business case comes from cost reduction. Automated scanning can replace manual inspection. This helps companies cut costs by up to 70%. Skilled inspectors can focus on more valuable tasks. They can focus on improving processes or keeping systems running. This way, they won't have to perform repetitive visual checks.
Better use of raw materials leads to about a 15% gain from accurate volume calculations. This leads to a substantial increase in the bottom line. Wood processing plants see quicker payback on equipment investments. They also save more as waste and rework decrease.
Integrating the SRI7300 into Your Production Line
Successful implementation of a 3D laser profiler requires careful planning. Place the SRI7300 unit on a stable part of the conveyor or roller table. The mounts help reduce vibrations. We verify alignment with gauge blocks or calibrated reference panels. This ensures both axes provide the promised accuracy.
Next, the profiler connects to the plant’s PLC or SCADA system. This setup lets scan data flow right into the control architecture. Most integrators create visual dashboards. These dashboards show defect heat maps, volume trends, and yield metrics. Operations teams watch them in real-time. When set up right, the system can automatically reject boards that fail to meet criteria. It can also send them to a rework station.
Operator training covers how to read scan outputs, perform regular calibration checks, and maintain optical parts. The SRI7300 gives clear, consistent data. This is different from manual inspections, where opinions can differ. As technicians learn the system, they move from finding defects by eye to analyzing data. They spot trends that show upstream problems like saw blade wear or humidity changes. These issues impact surface profiles.
Ensuring Reliability in Industrial Environments
Wood processing environments present their challenges like temperature swings, dust, and humidity. Engineers built the SRI7300 to handle tough conditions. It works well in temperatures from 0 to 50 °C. It also stays accurate in humidity levels of 35% to 85%, with no condensation.
You can store it in a secure place when it is not in use. It works well in temperatures from –20 to 70 °C. It won't lose its optical alignment or electronics. Routine maintenance keeps laser windows clean and performs calibration checks at regular intervals. This ensures the system maintains micron-level precision every day.
Driving the Future of Wood Manufacturing
High-speed 3D laser profiling is the best way to check wood surfaces and measure volume. The SRI7300 captures defect and dimensional data with speed and clarity. This helps manufacturers ensure quality, cut waste, and save on costs.
Investing in automated inspection technology is essential. This is because material costs are rising, and customer demands are growing. It's no longer optional if you want to stay competitive. 3D laser profilers are key for running wood processing lines. They help by using data in a way that maximizes its impact. They will help companies make the most of every cubic meter of wood. This ensures high product quality.
-
Exhibition2026-03-09AW2026 Seoul Recap: Ten Live Demos, the Future of Manufacturing, & South Korea
-
Industry News2026-02-13Automotive Connector Pin Inspection: How 3D Blue Laser Profiling Achieves Sub-0.01mm Repeatability
-
Corporate News2026-02-10Holiday Notice: Chinese New Year & Spring Festival 2026
-
Corporate News2026-02-04SinceVision to Showcase Advanced 3D Sensing and High-Speed Imaging Solutions at SPS Guangzhou 2026


